Ensuring the reliable performance of control valves starts with proper testing. The control valve seat leakage test procedure is a critical step in verifying that a valve can fully stop flow and prevent unwanted leakage. Industry standards from organizations like the American Petroleum Institute (API) and the American National Standards Institute (ANSI) provide clear guidelines and techniques to carry out these tests safely and effectively. In this article, we will walk through the key steps, standards, and best practices for testing control valve seats in heavy industry.
Control Valve Seat Leakage Test Procedure in Heavy Industry
This control valve seat leakage test procedure, performed according to API 598 and ISO 5208, pressurizes the valve to check for leakage and confirm its ability to isolate flow. The following steps outline the standard procedure:
Preparation for Control Valve Leakage Test
- Isolate and depressurize the valve before testing.
- Ensure the test area is safe and suitable for the selected test medium (air or water).
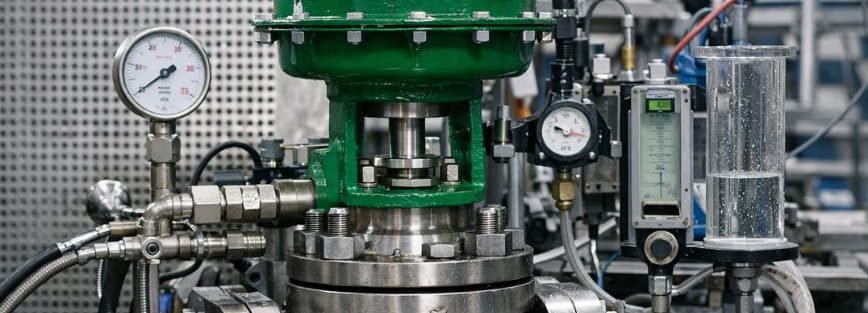
- Prepare the required instruments: pressure source, pressure gauge, and leak-detecting tools
Step-by-Step Valve Seat Test Configuration
- Connect the pressure source to the valve inlet.
- Control the pressure using a regulator during air testing or a pump during water testing, as recommended.
Applying Pressure and Leakage Check
- Apply the specified test pressure, typically up to 1.5 times the maximum operating pressure.
- Allow the pressure to stabilize for 30–60 seconds.
- Inspect the valve seat, stem, and potential leak paths visually or using soap solution or ultrasonic detection.
- In air testing, leakage is indicated by bubble formation.
Results and Follow-up
- Record any leakage, noting location and severity.
- Compare results with acceptance criteria (API 598, ISO 5208).
- Repair or replace defective components if leakage exceeds limits, then retest.
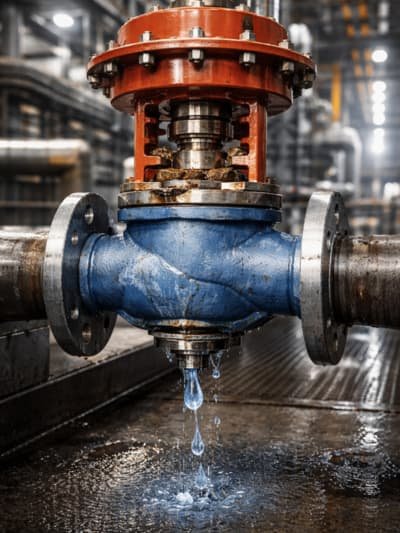
What causes seat leakage in control valves
Seat leakage in control valves occurs when the valve is unable to form a tight seal between the valve disk (or plug) and the seat. Common causes include:
- Wear and Tear – Over time, repeated operation causes erosion or abrasion on the valve seat or disk, preventing a proper seal.
- Corrosion – Chemical attack from process fluids can pit or corrode the seat surface, leading to leakage.
- Debris and Contamination – Particles trapped between the seat and disk can create gaps.
- Improper Installation – Misalignment of the valve components during installation can prevent full closure.
- Thermal or Pressure Cycling – Expansion and contraction from temperature or pressure changes can deform the seat or disk.
- Incorrect Material Selection – Using materials not suitable for the process fluid or conditions can accelerate wear or deformation.
- Actuator or Stem Issues – Malfunctioning actuators or bent stems may prevent the disk from fully seating.
For more on how stem issues like stiction can lead to other problems, read our guide on [Control Valve Hunting Problem]
What instruments are used for valve seat leakage test?
Several instruments are commonly used to accurately perform a valve seat leakage test and detect even minor leaks. Proper selection ensures reliable results and safe testing. Common Instruments:
- Pressure Source – Air or water pump to apply the required test pressure.
- Pressure Gauge – To monitor and control the applied pressure accurately.
- Leak Detection Tools – Soap solution, ultrasonic detectors, or bubble test kits to locate leaks.
- Isolation Valves – To safely isolate the valve during testing.
- Safety Equipment – Gloves, goggles, and other protective gear to handle pressurized systems.
What Happens When a Valve Seat Leaks
When a valve seat leaks, the valve cannot fully isolate flow, which can lead to process instability, inaccurate control, and reduced efficiency. Continuous leakage may cause erosion or damage to downstream equipment, increase energy consumption, and trigger unplanned shutdowns or safety risks. Detecting and addressing seat leakage promptly is essential to maintain reliable and safe plant operations.
Read About: Flow Meter Calibration Frequency: How Often Is Right?
What Is the Allowable Leakage for a Control Valve
Allowable leakage is defined by API 598 and ISO 5208 and varies by valve type and service. Leakage is classified Class I to VI, with Class I allowing minor leakage and Class VI providing a nearly perfect seal for critical applications. Selecting the right class ensures process stability, efficiency, and safety.
Control Valve Leakage Classes (ANSI/FCI 70-2)
| Leakage Class | Max. Allowable Leakage | Test Medium |
| Class II | 0.5% of rated capacity | Air or Water |
| Class III | 0.1% of rated capacity | Air or Water |
| Class IV | 0.01% of rated capacity | Air or Water |
| Class V | $5 \times 10^{-4}$ ml/min per inch | Water |
| Class VI | Bubble-tight (per valve size) | Air or Nitrogen |
Why Do Some Valves Pass Air Test but Fail With Water
Valves may pass an air test but fail with water because air is compressible and less viscous than water, so small gaps in the valve seat may not cause noticeable leakage during air testing. Water, being incompressible and more viscous, can reveal even tiny leaks that air cannot detect. This is why critical valves are often tested with the actual service fluid or water to ensure proper sealing and reliable operation under real conditions.
Need Support with Control Valve Seat Leakage Testing?
Riyadh Al Etqan Co. provides professional services for control valve inspection, seat leakage testing, and maintenance for heavy industries across Saudi Arabia. Our experienced team ensures that your valves meet API 598 and ISO 5208 standards, helping you maintain process reliability, efficiency, and safety.
Contact us today to schedule a consultation or on-site valve testing and ensure your operations run smoothly without unexpected downtime.
When Should a Leaking Valve Be Repaired vs Replaced
A leaking valve can often be repaired if the damage is minor and the repair is cost-effective. Full replacement is recommended when the valve is severely damaged or repair is too expensive.
- Repair: Minor damage, cost-effective.
- Replace: Severe damage or costly repair.
Can Seat Leakage Be Tested Without Removing the Valve
Yes, seat leakage can often be tested without removing the valve using in-line methods:
- Backseat testing for valves with a backseat.
- Partial stroke or in-situ leak testing while the valve is installed.
Full removal is only needed if the valve has severe leakage or internal damage. In-line testing saves time and reduces downtime.
Need Support with Control Valve Seat Leakage Testing?
Riyadh Al Etqan Co. provides professional services for control valve inspection, seat leakage testing, and maintenance for heavy industries across Saudi Arabia. Our experienced team ensures that your valves meet API 598 and ISO 5208 standards, helping you maintain process reliability, efficiency, and safety.
Contact us today to schedule a consultation or on-site valve testing and ensure your operations run smoothly without unexpected downtime.
FAQs
Can control valve seat leakage lead to process instability?
Yes, seat leakage is a primary cause of process instability because it prevents the system from maintaining a precise flow balance.
What is the back seat test for valves?
When the valve is fully open and the packing gland is loose or removed, the back seat test makes sure the valve’s backseat offers a suitable seal. It is frequently used in globe and gate valves with a backseat function.
What causes control valve leakage after shutdown?
There are several reasons why control valves leak after being shut off, but they all have to do with how well the valve seals.